expr:class='"loading" + data:blog.mobileClass'>

Monday, May 9, 2016

IKEA Hack - The Tarva Dresser Given a "Restoration Hardware Look"

Master Bedroom Bedside Dressers - The Ikea Tarva "makeover."

We took the Ikea Tarva, below:
IKEA Tarva 3 Drawer Dresser
and turned it into this:

Turning the IKEA Tarva Dresser into a rustic "Restoration Hardware" type bedside table was one of the projects I was most recently excited to take on.

I honestly hadn't looked up any small Restoration Hardware dressers to "copy" for this makeover, but I call any furniture that is neutral vintagey, more expensive than I'm willing to pay, gray-washed, distressed but sturdy, etc., "Restoration Hardware-ish."  That's a term, right?
I would even say using a similar transformation has been given the "Arhaus" effect as well. 

*I literally just went to the RH website and there are ones in similar colors to our updated dressers, like "antique gray," "light zinc," and "antiqued graphite" -  an almost exact color/finish to what ours turned out to be-
Antiqued Graphite, RH finsih, almost identical

Where to start:
I am such a visual person that I really need to see something over and over again to make sure it works, especially when it comes to decorating.

That's why I LOVE the internet for ideas, colors, sizing of furniture, all to get examples and images in my head that I can translate to the physical side of decorating.  It takes a lot of the guess work out of putting a house together.  And if you're not a decorator, like me, it's nice to have so many reference points that are easily accessible.

For instance, it's so convenient to be able to see a paint color in multiple lights, with different tones, in different spaces, etc. all before even buying the paint.  Same goes with furniture.  I love Ikea, but you can't buy something there (2 hours away), put it together, decide it doesn't work, then drive (2 hours away) to return it.  So that's where Google and Pinterest come in - to get a good idea of sizing and "look" of furniture before ever buying it.

So when it came to putting our bedroom together (one of the last things we've gotten around to), I referred to my Master Bedroom Pinterest Board with Ikea "hacks" - "hacks" meaning examples of how people have taken a plain dresser and transformed it into something fabulous!  

Here are a few examples of my pins that I kept going back to to get ideas from - 
Tarva

Rast
Koppang

***I knew I would have to go the "hack" route because the IKEA dressers I was looking at range in price from $35-$100.
Hopping over to the RH website again, I spotted 3 drawer dressers in the $1300-$1600+ range... to give you an idea of cost difference... which meant the makeover was a NO-BRAINER!!!


How I chose the Tarva:
After I decided the approximate size of bedside tables I was looking for,
(*Side note - because our bed is the focal point of our room - on the opposite wall of the door - the first thing you'd see walking in), I knew I wanted something pretty substantial in size on either side of our bed, not something that would be dwarfed by our new bed.

I narrowed it down to 3 different options and took a couple months to think about it and kept going back to my Pins before I decided on the right dresser (this process - the waiting - can be the most annoying because sometimes you just want to get a room done!) -

1. The Koppang 
The Koppang seemed like the easiest option because it was white and we wouldn't have to do anything to it BUT,
1. it was the most expensive at $100;
2. it was the largest at 36" wide - two of the Koppang dressers would just fit on either side of our bed, and
3. they are white - which I decided wouldn't be good with the WHITE STAIN 8 drawer Hemnes dresser that I wanted to put on the opposite wall from the bed; and then we had the white headboard I made over - too much white in one space even though I LOVE white these days.
The funny thing is, even while we were in Ikea this past March, Bill was leaning towards the Koppang... because it would take the least "doctoring" up - which would be none - just use it as it was... can you blame him? Just buy something and leave it as it is?  I've never heard of such a concept!!!


2. Next, I thought about the Rast
The Rast was a good option because
1. it's the cheapest at only $35;
2. it is untouched wood, like the Tarva, so staining or painting it was an option;
3. BUT I decided it was too short at 27.5" tall (our bed is around 30") and it would have been more work for Bill to build a base to make it taller.
I think this is definitely the best option for price and size, though! 


3. So lastly, it came down to the Tarva - THE WINNER (and VERY popular - there are lots of people on the Tarva "hack" craze I came to find out... I guess their Pinterest boards were loaded with this too)!  
*I forgot to check to see if it was in stock before we packed up the girls and drove 2 hours to the Cincinnati store!  DOPE!  Luckily we were able to get the girls' dresser and our main dresser BUT these were pretty big ticket items that I totally spaced on checking online for FIRST.  
Note to self - check big items online at IKEA if you don't live near one! 

I ended up ordering them 2 weeks later (paying a hefty fee for shipping of course) because I didn't know when we'd get back over there.  
I'd waited so long, I couldn't be patient any longer!  

But the good news is, that after Bill put them together, I was able to transform them in one night - surprisingly faster than I anticipated - from about 8pm - 12am - and then just a quick coat of waxing paste to finish up the next day.  

*I will include the STEPS for any of you interested in the makeover process in the near future! 

Until then, here are the dressers after getting their hack job: 
Bill's bedside table - I used some extra kitchen drawer pulls we had leftover from our kitchen reno.

Addie picked out the plant at Lowes (prickly cactus - has Bill Bill written all over it).  I had the pot and tray it sits on.  Bill picked out his lamp from Ikea. I bought the lantern used for $3, and the artwork was loaned to us from my mom a few years back - it's from New Mexico or Mexico - I have to check on that. 


I did the same process with my bedside dresser but the touches are a little more feminine - 

The knobs I've had forever but I think are from Homegoods.  The lamp base is from Goodwill ($3), lamp shade I had.  The topiary is from Marshalls (clearance for $8), and the rocks inside the plant pot are collected from the beach in Michigan.  The little glass candle votive is from Marshalls ($4 on sale); and the white and silver tray is from Homegoods ($10) - worth it because I set the kids' emergency nighttime medicine (well, last night I did), my water, lotion, etc. in it! *It's a good way to protect the top of the dresser, which I finished with wax.
Oh yea, and the glass and gold dish that holds my rings is from Goodwill, $2.  


I'm getting my pictures together of how I did this quick transformation and will post soon! 
*updated* 
Link To the How to.

Thanks for stopping by!  


Friday, May 6, 2016

Blog Return, House Reno, Yard Work, Whole 30, Trash To Treasure, and Blog Help {7 Quick Takes}


1.) Thanks to Addie and June for "acting up" during nap times lately to get me back in the blogosphere.  
June, at almost 3, still needs a nap, but Addie at 4 could take or leave it most days (she probably could use a nap every day but it just doesn't always happen).  There has been way too much giggling and chatting going on and me going in and out to quiet them for my liking; so since last week, I've been splitting them up for naps - one with me in our room, the other in her bed in their shared bedroom.  
Now instead of sneaking downstairs to paint something or clean something, I end up staying in my room while one of them falls asleep... sometimes taking 30min-1hr.  The great news is it's forced me to start going through and organizing pictures on my computer - which I've wanted to do for a long time!  Errr, I guess thanks for being stinkers, girls?  

At least the baby still naps most days... but I don't want to jinx myself so pretend I didn't say that...
Where have the last 11 months gone?

2.)  I've gotten some of our early house pictures together enough to post what this place looked like when we bought it this time last year.  
Bill says, WOAH, what were we thinking?!  
Check out the before pics if you have a minute!  
And this is what it looked like during the demo.  
I know I'm plugging these posts but the changes are huge!  And of course I'll start posting some after pics of our renovation too, so you can compare now to then.
The kitchen wasn't terrible, actually, but the sellers didn't even include a picture of it in their listing. We had no idea what it looked like when we went in to look at it.   I'm thinking it could have been that the two doorways on the other side of the fridge were so narrow that you had to turn sideways to pass through next to the fridge.  The 2 layers of linoleum floor and orange and green tile backsplash didn't help much either.  But for a 60s kitchen, it could have been worse.  Oh wait, the cabinets were painted white from orange right before we looked at it.  Ok, there's the worse.

3.) Spring came early this year and we've spent the last 5 weekends weeks getting the outside of the house looking like someone actually lives here.  

We made a major change to the front porch and switched out the metal posts for big rough cedar ones which gave it a huge face lift.  You can check them out here.
And almost everything we planted in the fall (from mom and dad's house and Lowes 75% clearance) has come up which also makes the house look a little better!
But the back of the house is an entirely different story.
Last summer, before we were in the house, Bill tore out the large deck and a huge mud spot was what was left in it's place.
Until we save to build a new patio back there, our plan is to grow grass on the left and have a little garden contained by some black fencing that was in another spot on the side of the house.
Getting it all ready took a couple days! 

We planted pumpkins, zuchinni, cucumber and beans in here.  Herbs are potted.  
Thanks for the help, big guy!


4.) I recently completed a WHOLE30... I know, I can't believe it either.


30 days of detox, pretty intense, almost impossible initially...
This one did it before me, but she's awesome and has a lot of discipline! We will probably do one together in a few months if anyone wants to join us...?

Quick thoughts - prepping and cooking all my food was a lot of work, feeding my family different things on top of it was a lot of work (I know you can feed them what you eat, but have you met my husband???) ... Overall I think I'm glad I did it and I guess it was worth it (and started to lose some much needed baby pizza weight - still have lots to go, though!); but I don't know how to go back to normal.  For instance, eating healthy, pretty much the same foods I was for a month and then throwing in a treat here and there hasn't worked since I finished last week - Eating some chocolate here, popcorn, there just makes me want to keep splurging.  It's like oh I had that one thing this morning, I might as well cheat the entire day, or the rest of the week for that matter!!!  Or take yesterday for example - I had a healthy compliant soup I made but then realized it was cinco de mayo and thought I better have some nachos. and.a.chocolate.bar. maybe a margarita, and so on! ARGHHHH.
As my super healthy sister Katie said, "Once you get a taste of that sugar or grease in your system again, you want it all the time."  Man, I hate it when she's right.
In addition, I never had this surge of energy people talk about -
Maybe I'll just have to accept the fact that as an adult, I should be eating healthy ALMOST all of the time.  Tell me, please, what is your secret to balance???  I guess it's called discipline.  
And I guess there is something to be said for not just eating whatever we want when we want it (which is what I do).  Craving something?  We can just pop out to get it!  Our culture has access to everything nowadays my parents remind me, so we never tell ourselves no... that's probably a whole other post for another time.  
Anyways, I'd just like to be able to splurge a few times a week.  
#thestruggleisreal #firstworldproblems.  
Thanks for the tissue ;)

5.)
I was outside painting a bistro set during Sunday naps (sometimes I still sneak away), and went around to the garage and found Bill doing this - turning our junk into something useful.  I don't know it's it's "trash to treasure" worthy, but it will work nonetheless! 
He didn't want to go to the dump with these old doors that were leaning against the garage (isn't that where most people keep their trash?!) so he got creative -
And he didn't want to bother me to help him, so he got super creative supporting the old doors with chairs while he drilled - and of course I had to snap some pics.


 Bill calls it the hillbilly yard tool shelf - 
Then he put nails inside to hang yard tools too.  AND IT WAS FREE!!! Yea Bill! 

6.) The blog needs some desperate sprucing up.  Any recommendations on who to use for help with title and layout and such? Or are you all super savvy blog technicians that do it yourselves and could maybe point me in the right direction? 


*Keep in mind, I don't do computers; it's pathetic I know, so something easy please! And thank you! 

7.) Next week, I'm going to post an IKEA "hack" on the Tarva dresser.  Hope you come back to see the transformation!  


Happy Mother's Day weekend.
Linking up with Kelly!

Tuesday, May 3, 2016

House Pictures - DEMO Weekend

When we got the renovation quote back from the contractor (who the floor guy goes through too), it was way more than we expected to spend (isn't it always?!) - a huge renovation reality check that's for sure.  We had to cut stuff out, change things up, and figure out how to do a renovation that was more affordable but that would still work for our family for the time being.

Of course after we added in all the unforeseen costs and "extras", by the end, we were still spending what we didn't want to.  OUCH!

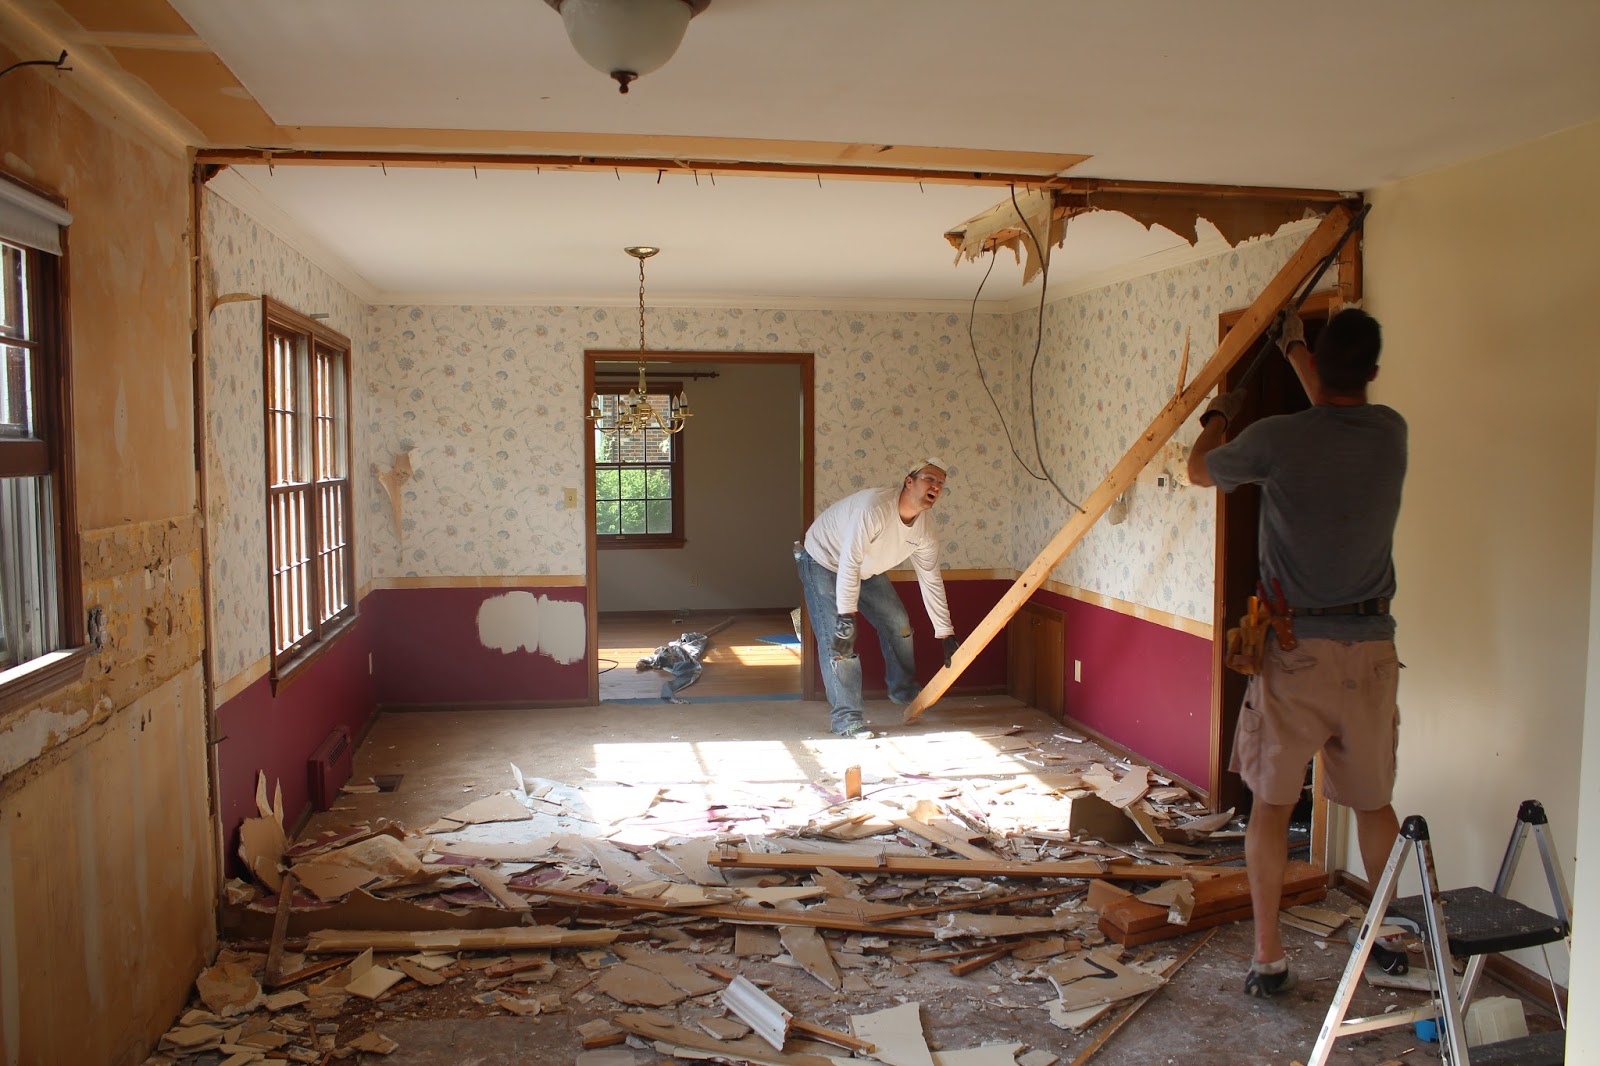
BUT, initially, one of the BIG things we cut out of the bill was the demo cost, meaning doing the demo ourselves (Dad, Andy, and Bill).  We definitely lucked out that my Dad and brother Andy had done a lot of this stuff before, so it wasn't haphazardly done, the blind leading the blind type thing (again, super lucky, I know!!!).  But the deal was that they would help us for 2 days/ONE weekend (Friday afternoon - Saturday).
***We didn't want to overuse the family's help because Dad and Andy always have plenty to do at their own houses haha!

So Friday night after work and then all day Saturday the 3 guys would do as much as they could before for the construction team started on Monday (no work on the Sabbath -Mom's rule!).

And in 1.5 days they were able to get it all done: 

Oh yea, in case you were wondering about our level of crazy, this guy was only a few days old at the time - 

Ok, where were we...

1.
Removing the kitchen.
Everything had to go!
The kitchen BEFORE - 
The kitchen DESTROYED below- 
Yikes sorry about the lighting! 

2. 
After the kitchen was torn out and hauled out and all the linoleum floor ripped out and thrown out into the dumpster (that's a lot of OUTS, yep, everything OUT OUT OUT); the first wall to go down was the wall between the kitchen and dining room.  
Dining room was on the other side of the far wall.  Oh man that floor! 
Dining room is just in through that doorway on the opposing wall (you had to shimmy beside the fridge to fit through) -
Gone - 

 In between the two rooms here - 

Full shot from the breakfast room through the dining room - 
Floor gone! 
Standing in the dining room looking back into the kitchen -


3. 
Then next was to remove the wall to the left of the entryway, dividing the wood room.  
Entryway with slate tile behind this wall - 
to the left you can see the slate tile in the hallway and behind that is the carpeted dining room with red painted up to the chair rail.  
Entry wall down, totally open to the wood room -


4. 
Then the guys had to jack hammer the slate floor and 3 inches of concrete in the entry hallway.

Entry way slate up and wall to the left down.  
Shot shown walking in from front door and down to dining room -


***We wanted the whole main floor to have the same wood flooring, hence the ripping out of the linoleum kitchen floor and the slate tile in the entry.


5. 
Last of the demo was removing the load bearing wall - the wall between the kitchen and wood room -
just on the the other side of the pantry doors to the right - 

In kitchen looking into wood room -

Other side of the load bearing wall was the wood room. - 
Remember this?

Standing at the front door.  Entry wall down and tile and concrete out. 
Wood room looking into kitchen - 
The 17 foot steel beam will go in the ceiling where this load bearing wall is.  
Now from the kitchen the front door can be seen -

Now standing in the dining room, you can see the fireplace through the load bearing wall - 
Don't write this chandelier off yet, it makes a reappearance.  
A shot of the "whole" house from the back hallway from the garage - kitchen and dining on left, wood room, old entry and front door on right.  


Oh yea - cute visitors popped by to check the progress and that Grandpa, Uncle Andy, and Bill weren't slacking off - 
Cousin Zeke and Junebug, who didn't know what the heck was going on.

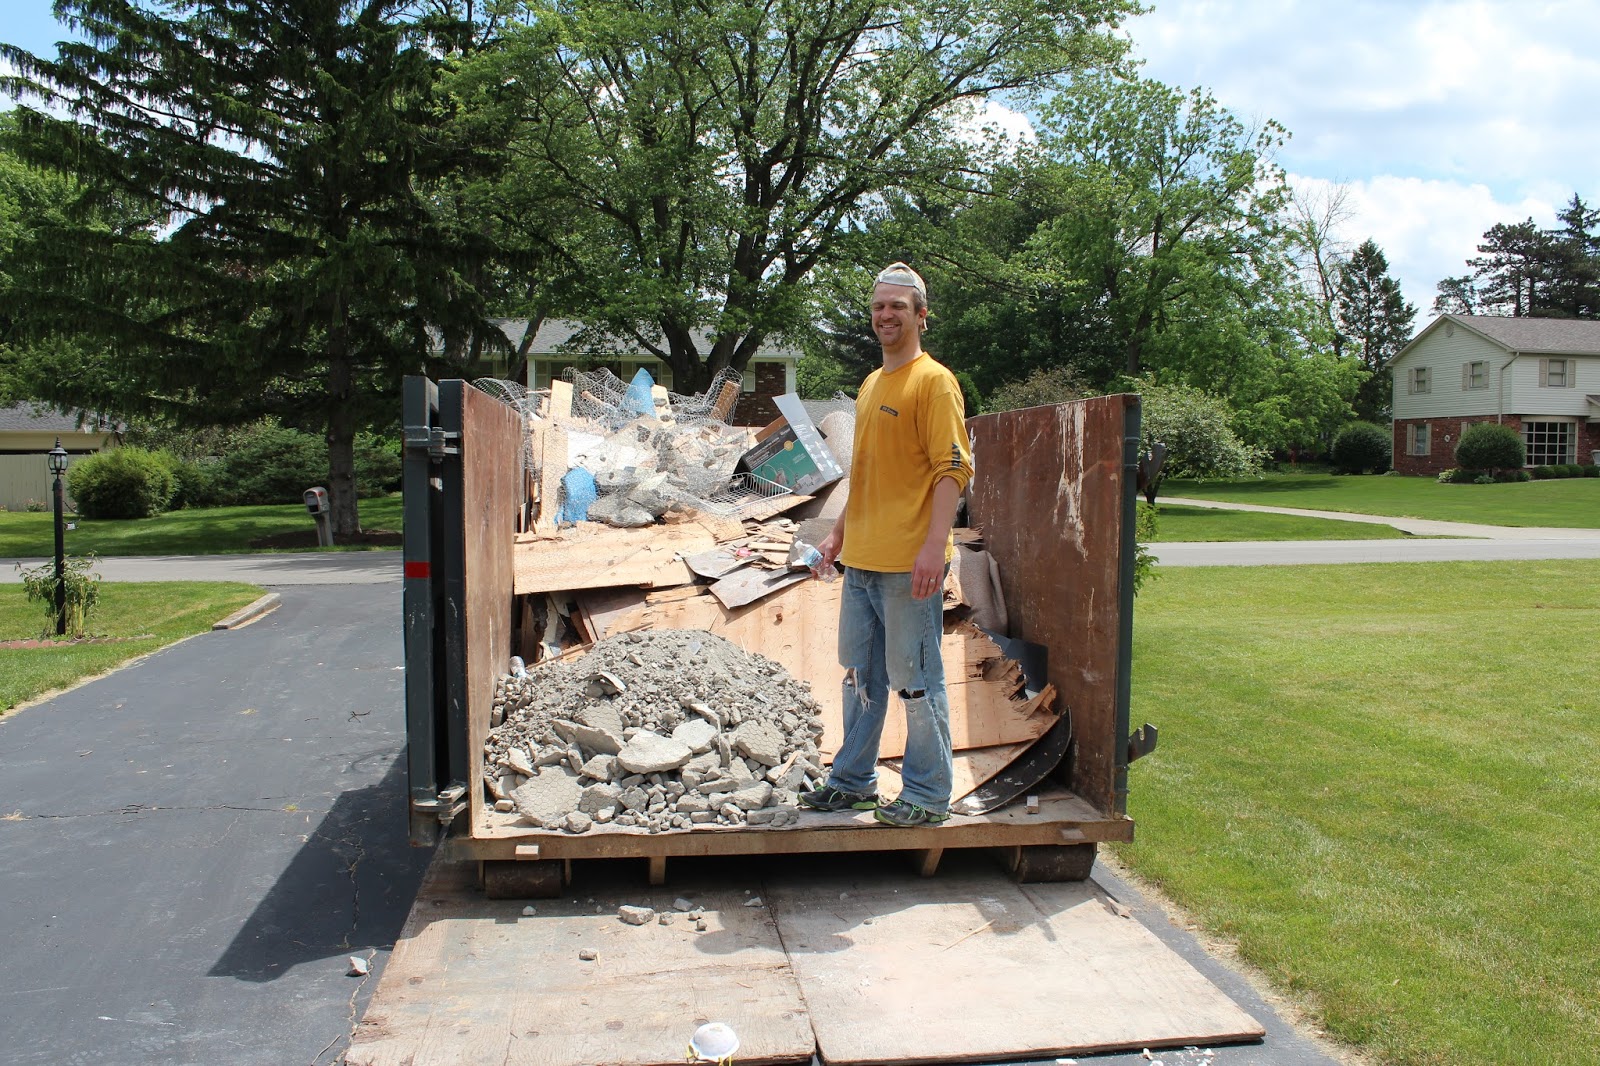
First of three dumpsters getting filled.

Phew, that's a Friday night and Saturday day of a demo!
Unfortunately this team isn't out for hire, but I'm sure glad I could afford them! ;)
Thank you Dad and Andy!

Now onto the renovation!

And this guy could have cared less about all that was going on - 
Trip Trip a few days old.

Happy first week of MAY!  AND happy birthday to my amazing sister in law, Jessie (thanks for loaning us Andy for this demo weekend)!

01 09 10