
For myself, and any of you renovation people, I thought I'd post some "behind the scenes" of how we got from point A to point B (from last year to this year).
It's super crazy to think of all the changes that can happen in a year (I feel like I've been thinking about this a lot lately so I apologize for over stating it). For instance, I can't believe we are living in our house, that it's actually livable haha, and that we are getting to enjoy it (even though it's not always picked up or clean)! It's not even close to perfect AND we still have a TON to do, but we can rest easy knowing our house is becoming a HOME. Knowing that the kids are growing up here and they get to run/crawl barefoot in the backyard and have a toy room and a bedroom they really are excited about makes our crazy idea of doing a renovation with 3 kids 3 and under not seem so crazy - or maybe the trick is to forget how hard it was to really appreciate how far we've come. Ha!
This time last year, we were far from this "settled" feeling.
Bill took a new position at work, Trip was born, I had a ton of house decisions to make and people to meet with, and we were living at my parents' (we will always be in debt to mom and dad for letting us live with them last spring and summer, but having a newborn outside of our own space and taking on a major renovation are things that I'm glad we have moved on from)!
Bill took a new position at work, Trip was born, I had a ton of house decisions to make and people to meet with, and we were living at my parents' (we will always be in debt to mom and dad for letting us live with them last spring and summer, but having a newborn outside of our own space and taking on a major renovation are things that I'm glad we have moved on from)!
CHANGE is a good reminder that if things are pretty rough in life, they could easily be flipped around in a year's time; but also that if things are going smoothly and really well, to soak up those moments because they don't usually hang around for long, and next year could look a lot different.
Anyways, I am still going through some of the AFTER pictures of the renovation, and am excited to share those, but first, I thought it would be cool to post some of the DURING pictures, reminders of what it took to get our house feeling like a home. I'm learning with each project we check off, it feels more like a home, which means we can really live here and thrive here.
*While going through my photo stream of pictures last year, here is a sequence of pictures from my phone:
It goes from this granite slab-

to Dad's kitchen plans -


to him -
 |
| We must have been finalizing the kitchen plans the day before I went into the hospital! |
 |
| All ten pounds of him. |
Yes, the pictures on my photo stream are in that order.
So if you don't like our kitchen finishes I'll share later on, just blame the big guy... who looks guilty to me -
 |
| He'll be 1 on Sunday!!! |
...moving on, sorry for the picture sequence distraction!
There are so many "fun" parts of a renovation - picking all the finishes like floor and trim style and paint colors and kitchen cabinets, appliances, etc.; but some of the most important things are what are needed to make a BASE - what is in the "background" or underneath, the "first layer" to go off of - all that had to happen before we could get to all the fun stuff. If you don't get this right, as my mom says, then it doesn't really matter how great the "top" layer is because it won't look good or feel right... does that make sense? I'm in no way a designer but I think you'll see what I mean!
I wanted to share the things that were necessary for the function and flow of the house, and that add to the whole "picture" of the house as it sits today.
If we would have left out one or the other of these, it would be a totally different house.
I also think it's so true that it's usually what you can't "see" that costs the most!
1. The Foundation
An obvious upgrade for any house makeover is making sure the foundation can support the new structure. Here is where the "what you can't see costs the most" comes in.
We knew by taking down the load bearing wall, that there would have to be a steel support beam (17' long) in the ceiling of the first floor to hold the second floor up.
What we didn't know was that the foundation supports beneath the house weren't poured directly beneath that load bearing wall, but rather 1.5 feet off to the side. What does this mean? That we had no idea how the house was standing up without being supported by cement foundation. Maybe houses were just built so well in the 60s that the rest of the structure was sound enough to hold itself in place? No idea. But it was mandatory to our new bases, of course! It was quite a big hiccup, costing a bit more than we thought this part of the reno would, on an already expensive upgrade.
 |
| If only had that pantry space still... |


New foundation bases had to be poured -

Steel beam is in up above and new foundation poured underneath -

2. We opened up the doorway that leads to the back hallway.
The bulkhead was taken up to the ceiling and the doorway was moved 3 inches to be flush against the wall. It's not that big of an adjustment BUT what a huge difference it makes in the look of that back area.
It used to look like this -
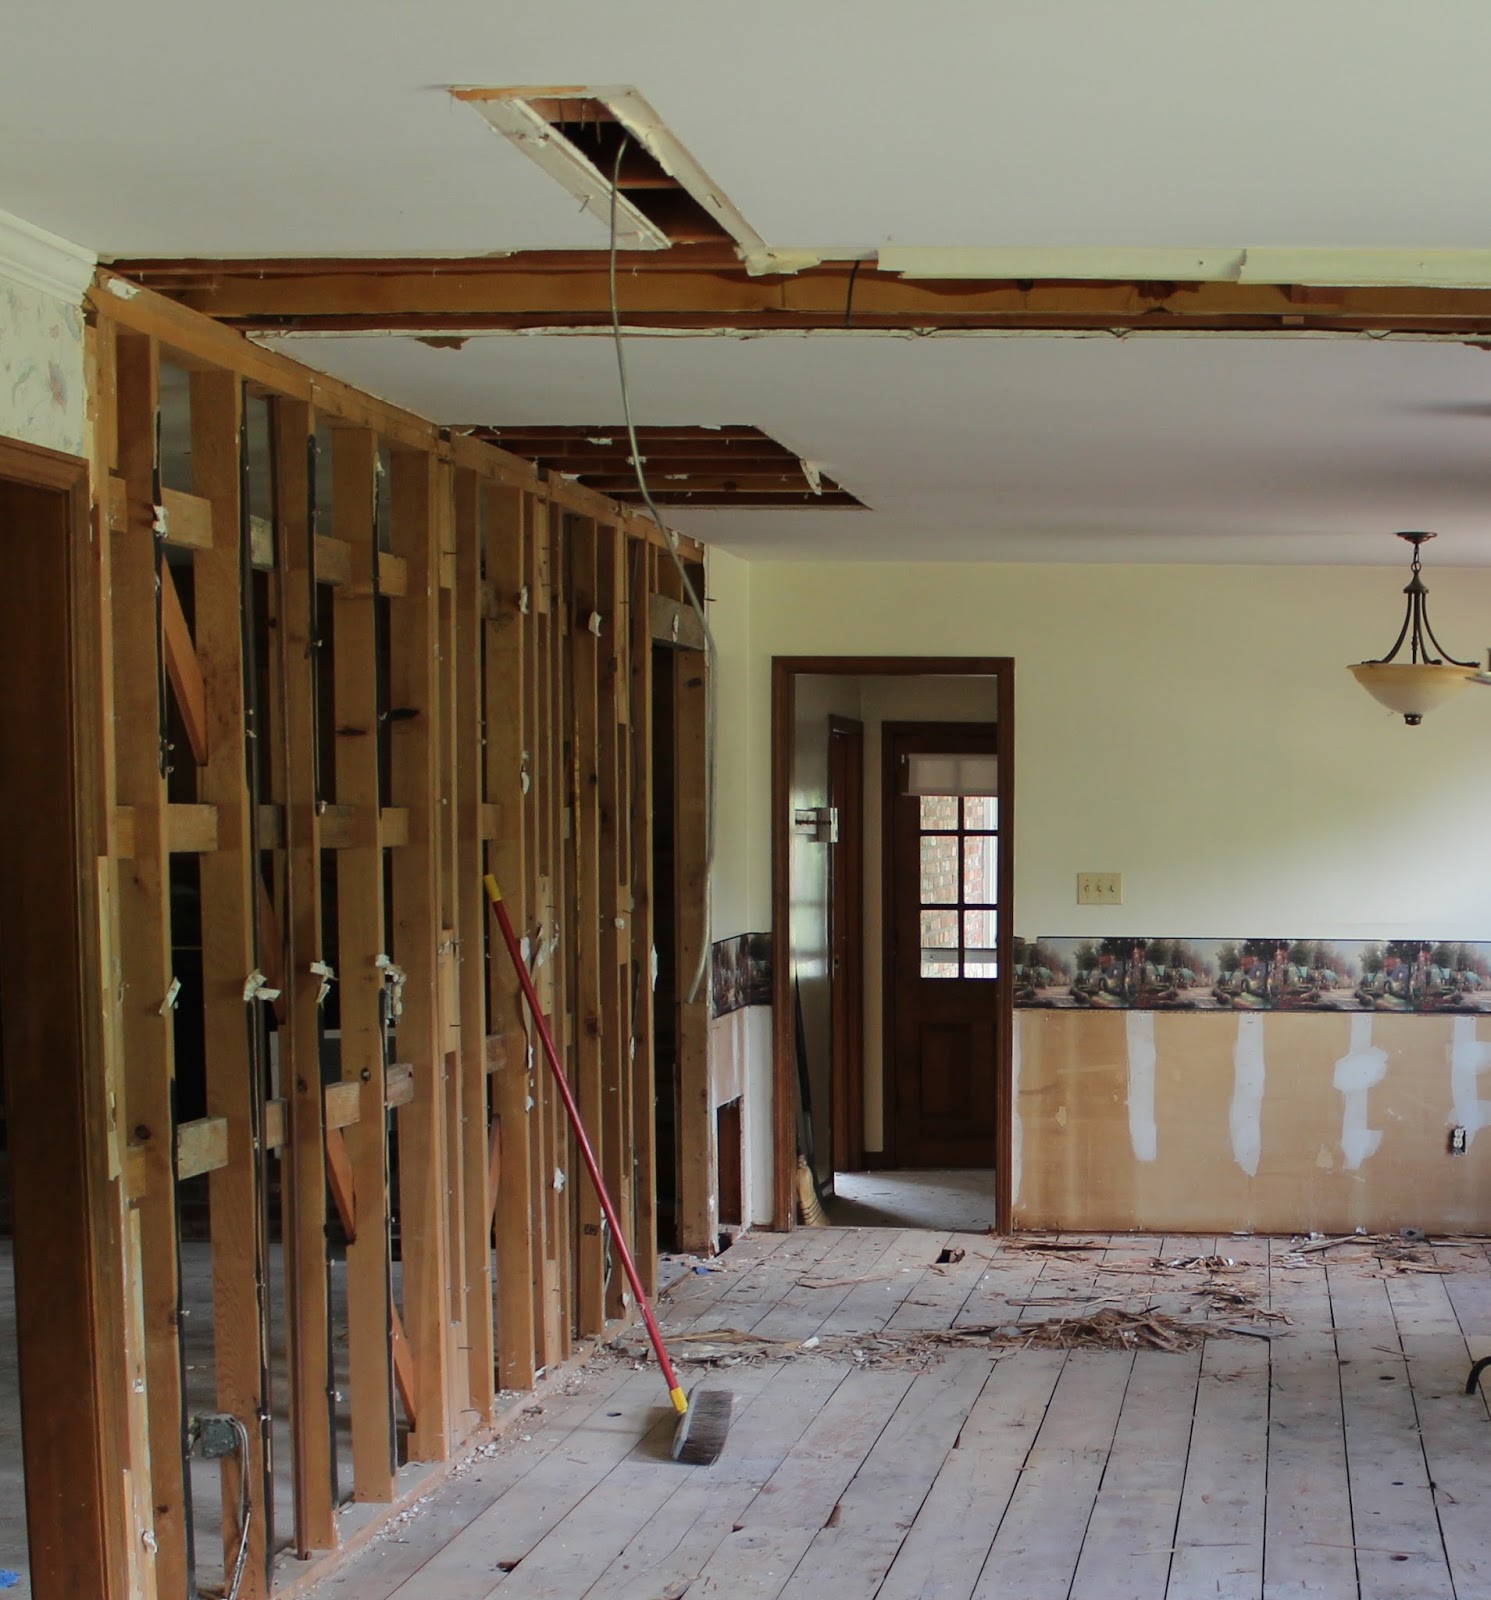 |
| We just had the doorway opened to the wall on the left side and the bulked opened up to the ceiling. |
After -
  |
| Big impact! |
3. Wall Paper Removal
Getting the wallpaper in the dining room and the stairwell/upstairs hallway ended up being quite the project. It's something we don't think about now, but was a huge change in the look of the house.
It was in the dining room -


I actually liked one of the layers of the dining room wallpaper! ;)

Under the floral paper was this old city scene!

 |
| This paper is probably 50 years old and reminded me of Boston, but Bill wasn't on board with keeping it! |
And the stairwell and upstairs hallway -

But it took two weeks to get the stairwell and hallway paper down and the walls prepped for primer. We had to have the drywall guy remove this and repair and prep the walls because it would have taken us years. Him two weeks. Us two years!
I mean layers and layers - 


4. Shortening one of the two kitchen windows.
The next "unseen" change is the second kitchen window. It used to be a long window but we wanted it to match the shorter sink window so that the new counter could run under it.
Here it was in the old breakfast nook -

The new counter would be an L shape in this corner and run underneath the window -

We wanted it to be the same size lengthwise as the window on the left, which meant finding matching brick outside the house to fill in below the window.
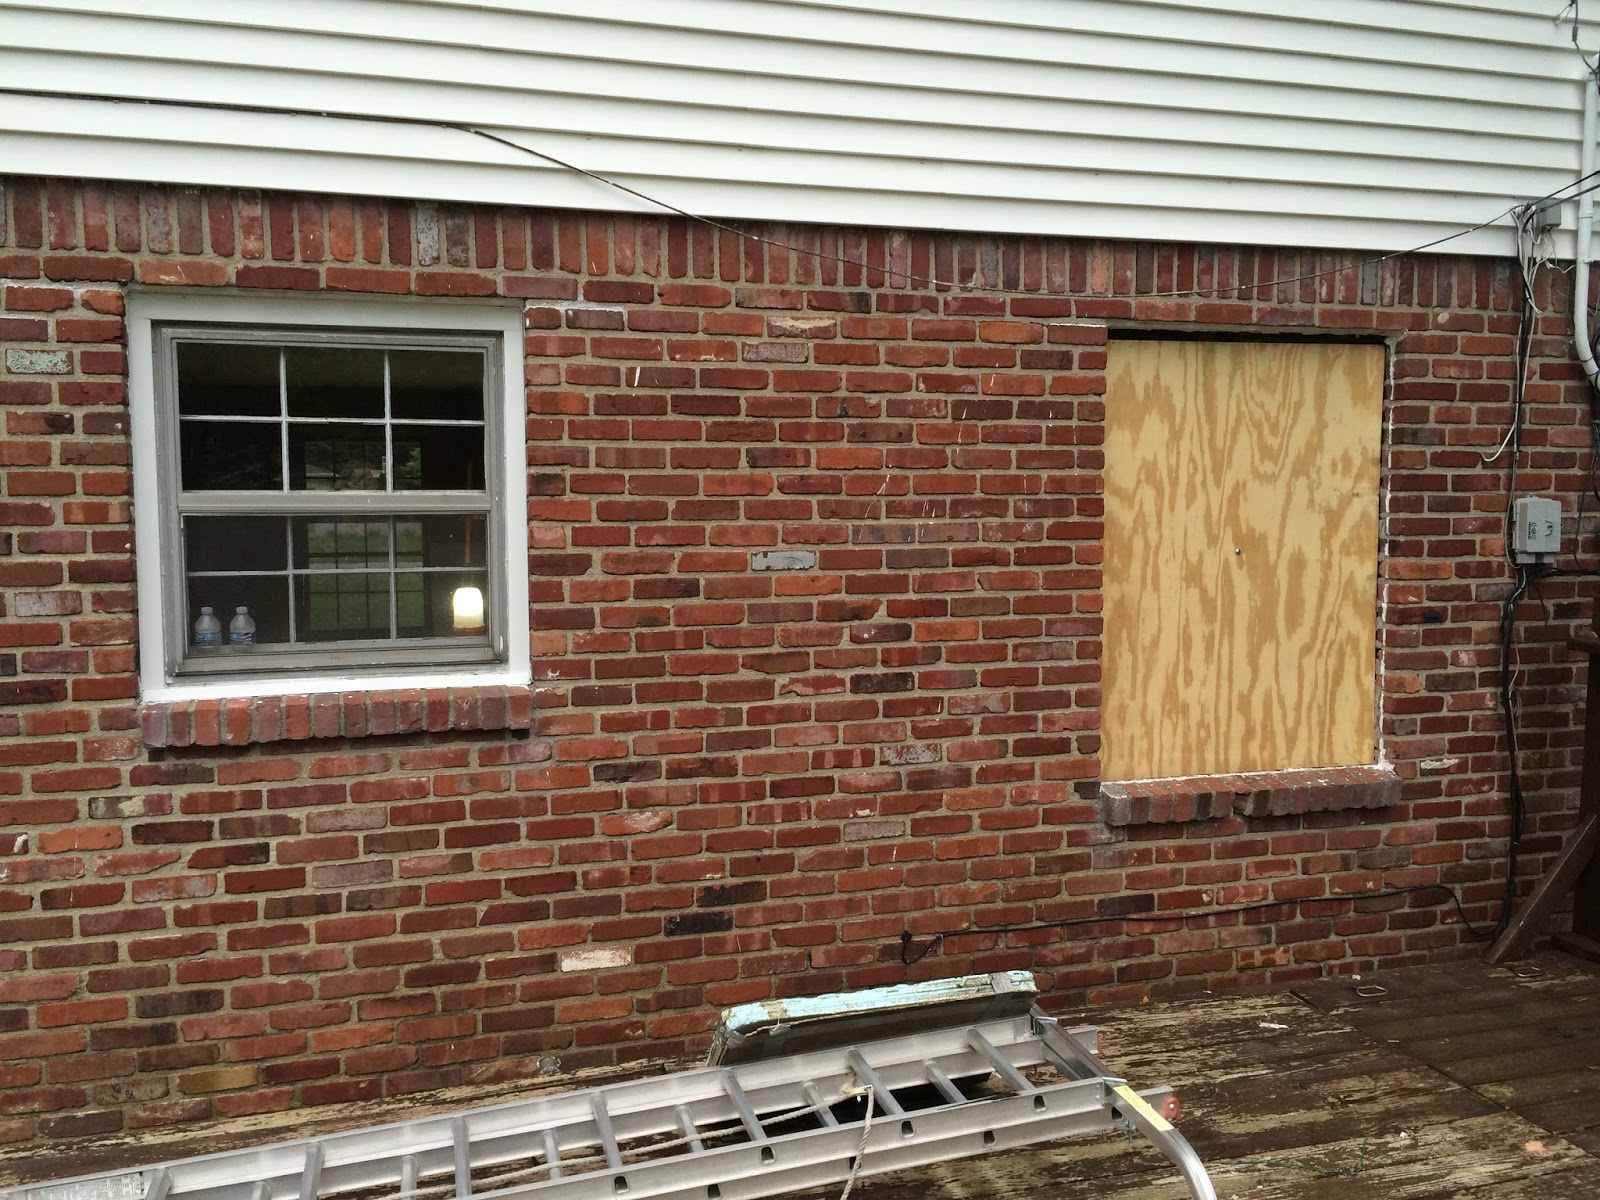
You can see the new size below -

5. Recessed Lighting.
Before the drywall went up, we needed to mark where we wanted the can lights to be throughout the main floor. This is a change that we don't "notice" that much now because they are just lights, BUT if we didn't put in the 18 ceiling lights, the house would have a VERY different feel to it. Lighting (and paint) is something that can make a HUGE difference in a house, so the saying goes.
So the night before the electrician came, Dad, Bill and I marked where each light would go (using the flashlights on our phones to work by until midnight haha).


6. Combining the two thermostats into one sleek one.
Both thermostats (we have boiler heat too) on the dining room wall were converted to just one touch screen thermostat and moved over as far as we could get it to the opening of the doorway below -
 |
| There isn't such an eye sore on that wall anymore! These old ones would have been out of place! |
7. Bulking up the window and door trim.
This was something I was adamant about to bring the whole main floor out of the 60s. I spent days looking at trim and even though I love the craftsman and farmhouse trims, they wouldn't go with our short ceilings. And I quickly realized that we wouldn't be able to do something super bulky because of the window sills that were already in place, and too thick around the door frames would have made our low ceilings seemed lower, but I still wanted them to be wider than they were.
Just an extra 1.5" in the same colonial style trim made a huge difference!
Trim makes a big impact! 

Old trim pulled off -


The "fun" stuff was still going on at the same time - like picking fabric for an antique couch, choosing floor stain, kitchen cabinets, light fixtures, etc., but I'll save those for some AFTER posts!


Have a good weekend!!!
Linking up with Kelly for 7 quick takes!
No comments:
Post a Comment
Gracias for saying Hola!